
type
status
category
date
slug
summary
tags
icon
Last edited time
May 21, 2023 07:57 AM
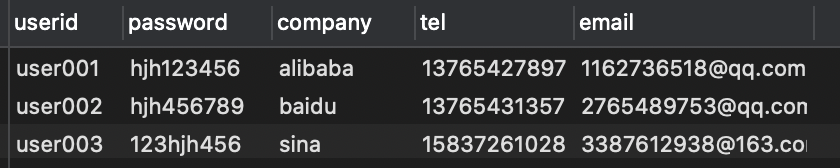
一、通过MySQL建立数据库及表
二、、使用Nodejs+express建立工程
- 安装好Nodejs
终端下输入node --version回显示版本,则已安装好

- 安装MySQL
- 安装express
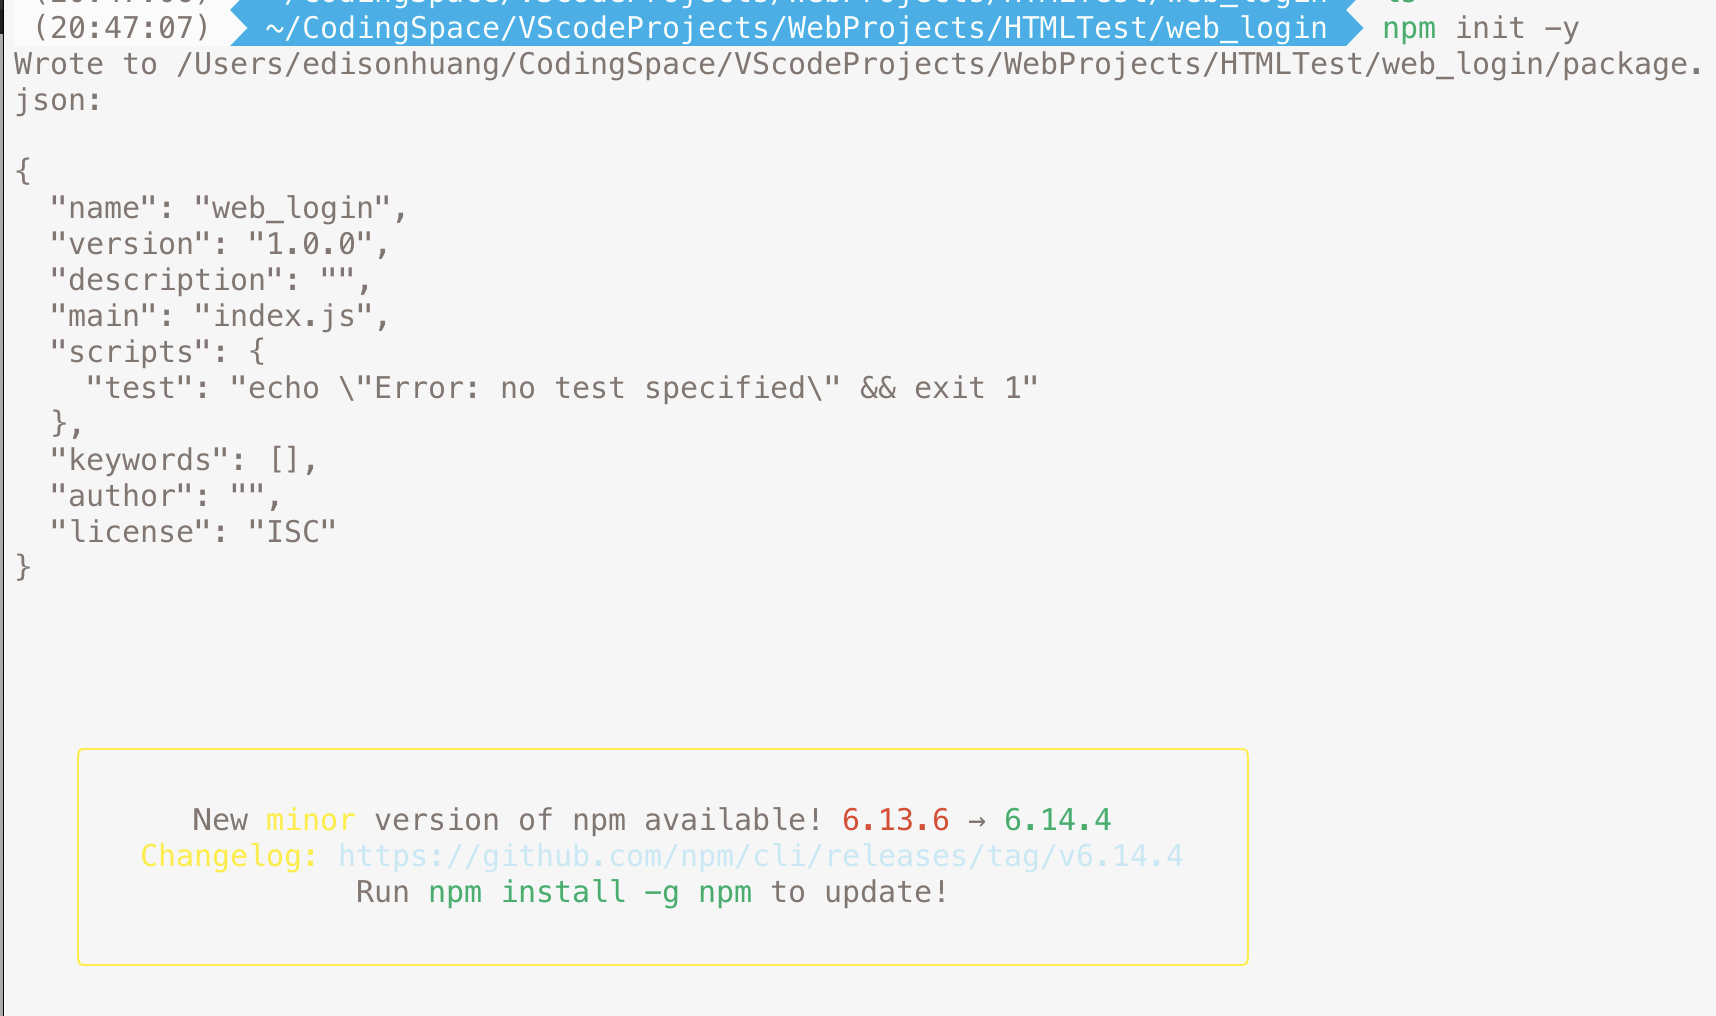
- 进入项目文件夹执行命令
npm init -ynpm install express --save
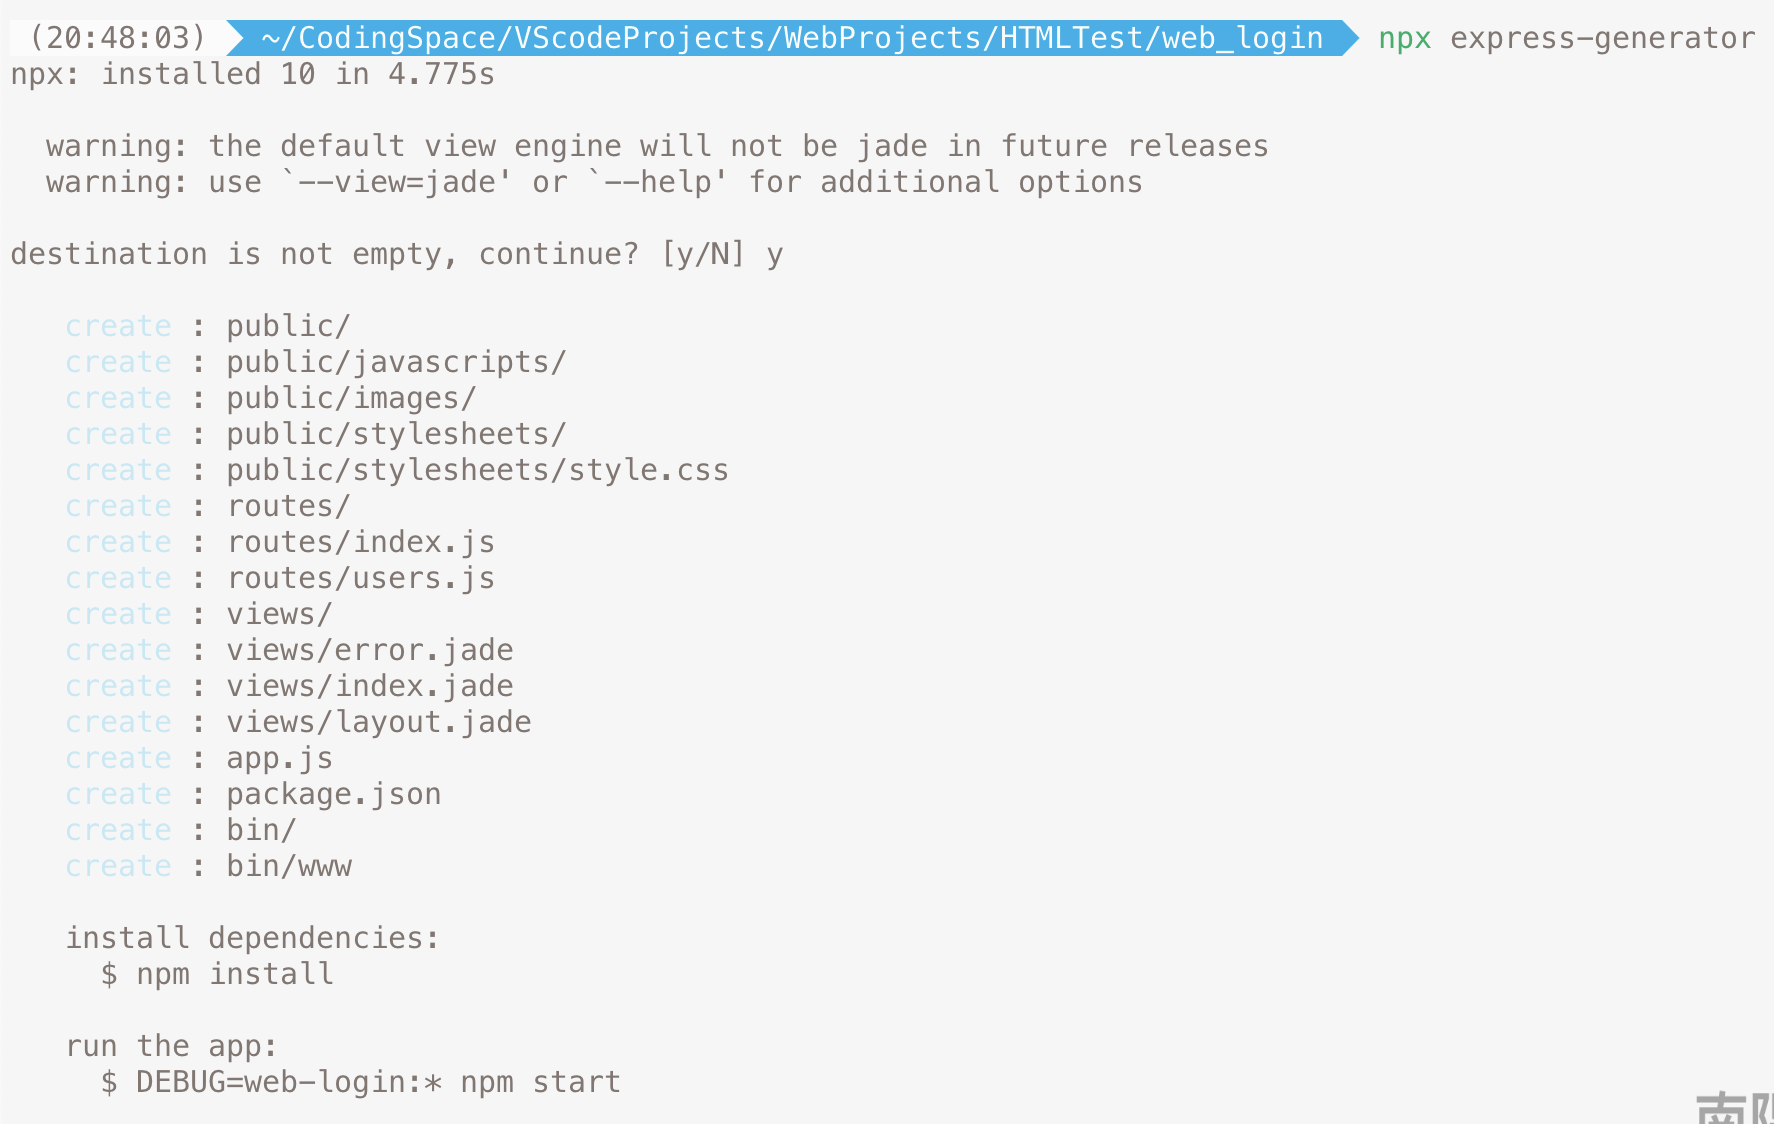
- 通过应用生成器工具 express-generator 快速创建一个应用的骨架
- 继续在当前目录下执行
npx express-generator(运行 Express 应用程序生成器)npm install(安装所有依赖包)

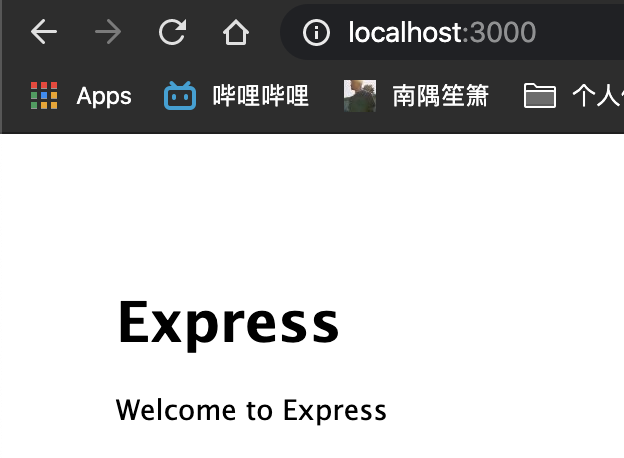
- 运行项目
npm start

执行过此命令后
即可在浏览器中输入
http://localhost:3000显示如下则成功
- 将MySQL引入项目
终端键入命令
npm install mysql --save
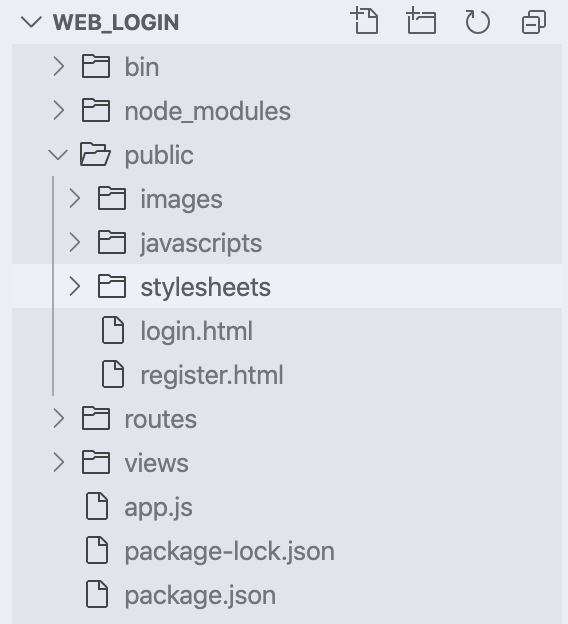
- 生成的目录结构如下(
login.html与register.html是我后来加的)
经过以上步骤,项目基础框架已经搭建完成
三、修改端口号
强烈建议
我个人搭建完项目之后,一直要不是验证出错,就是404
重新
npm start则一直显示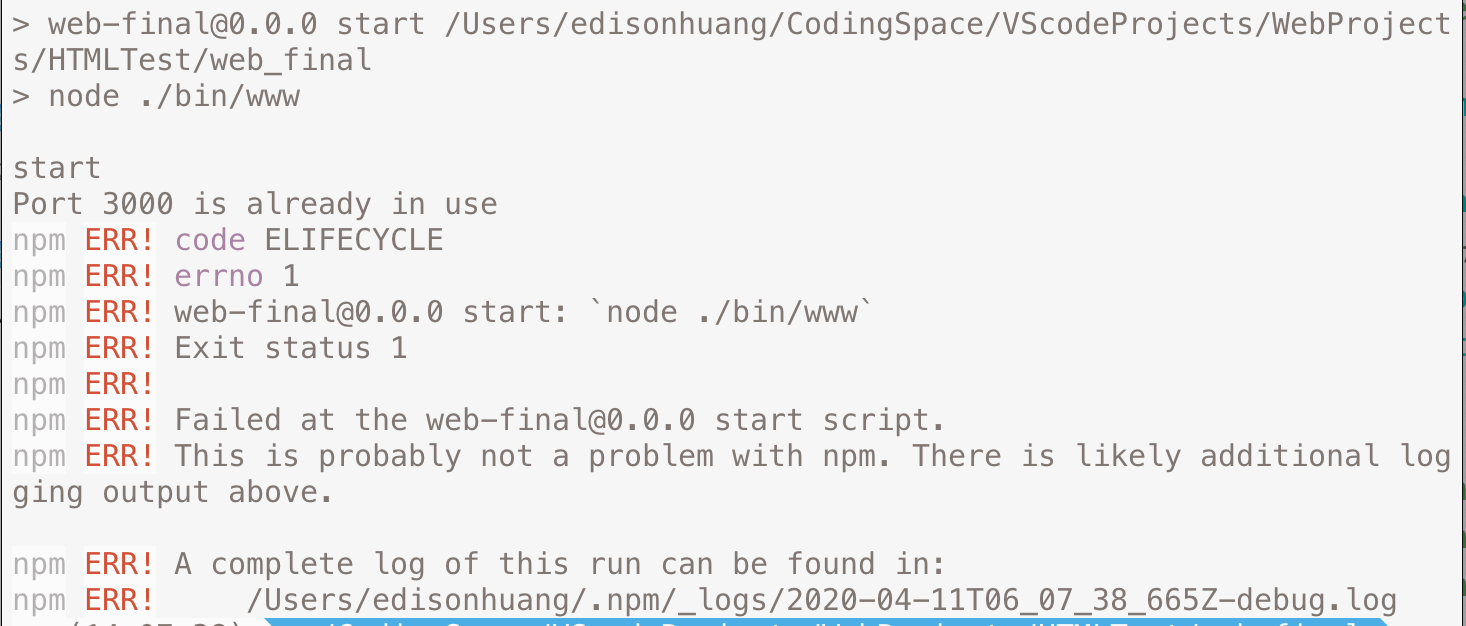
也尝试了
sudo lsof -i port:3000,以及killport 3000然而不行,也不知道为什么,搞了1个多小时。最后把端口号修改完后就可以了 = =!
修改方式
进入工作目录的
bin下的www文件中,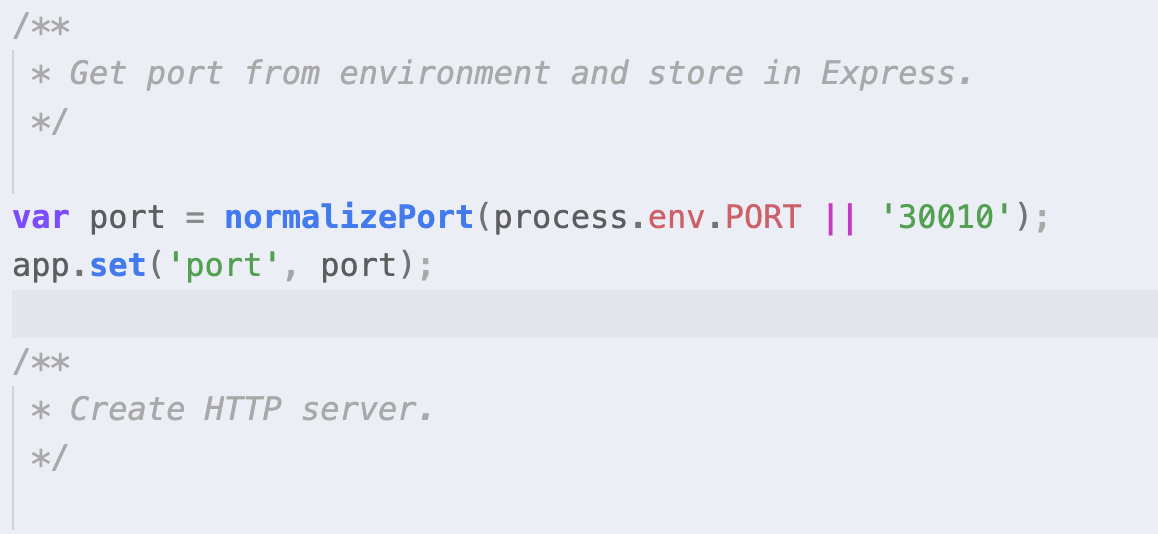
将
||后面的数字改成端口号就可以了,我这里改成了30010,之后就可以顺利的npm start了四、前端页面及完成效果
1、登录页面

2、注册页面部分

如果输入框未填写内容

内容未填写完整
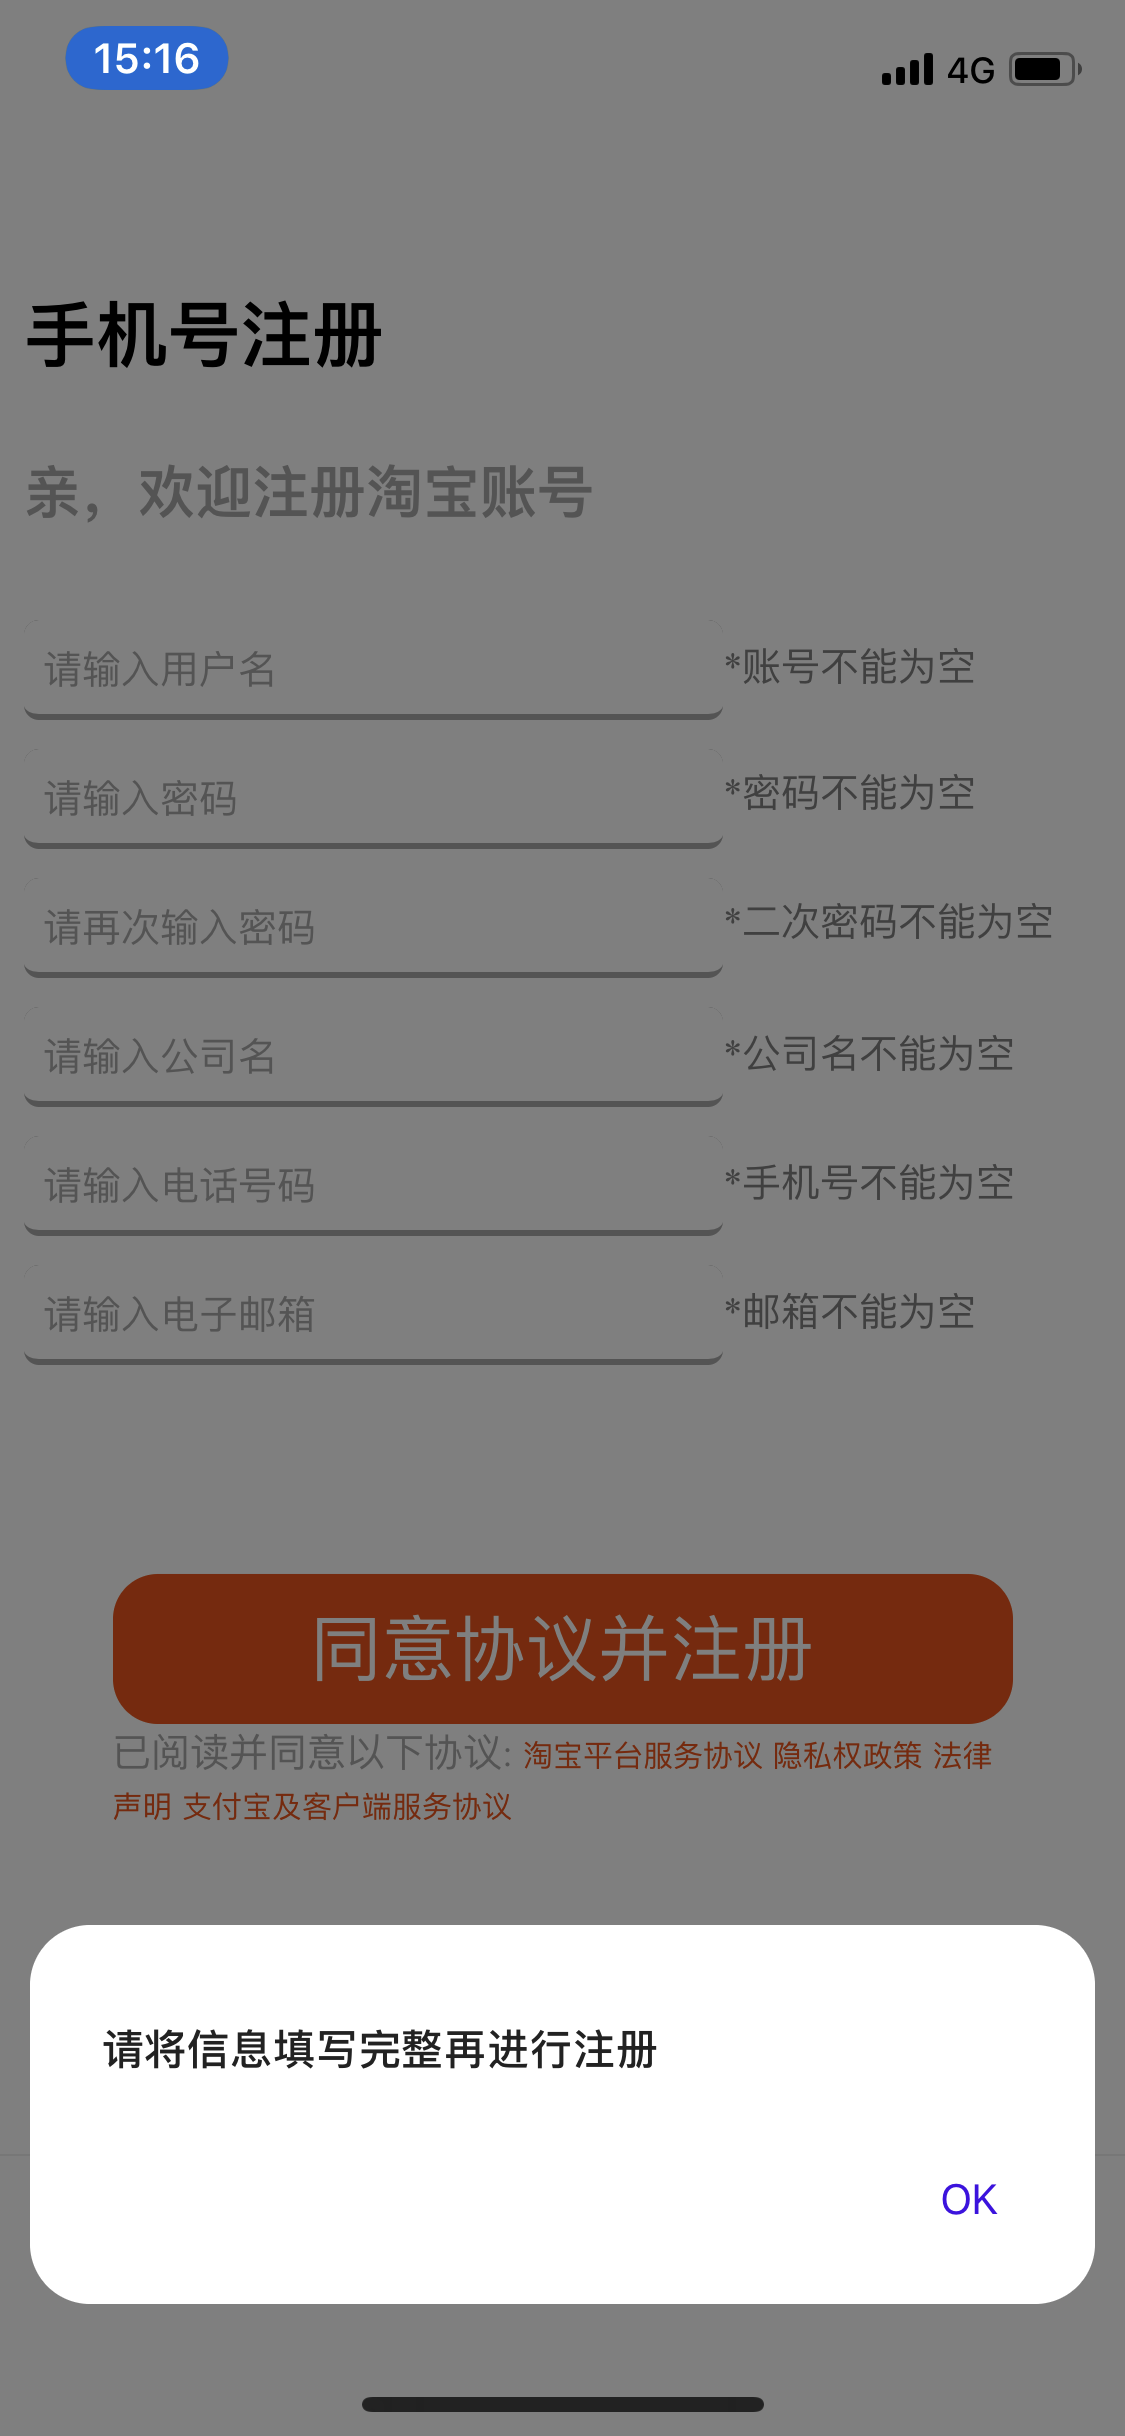
两次填写的密码不同

登录成功显示内容

五、主要代码部分
1、对于app.js的设置 app.js中
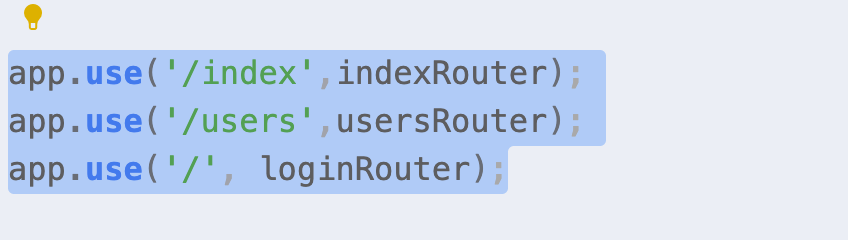
- 将login路由引入到app.js中
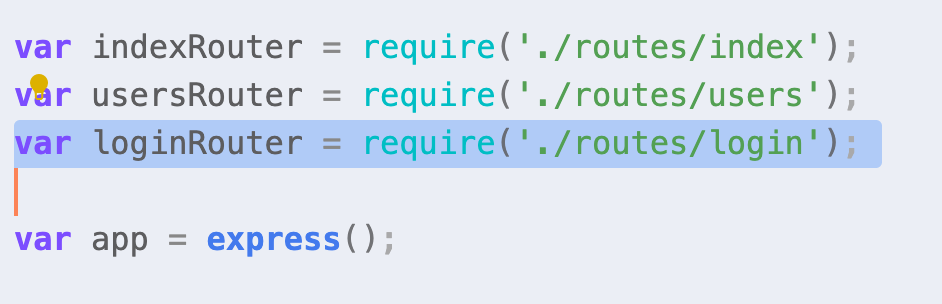
- 将此路由作为根目录
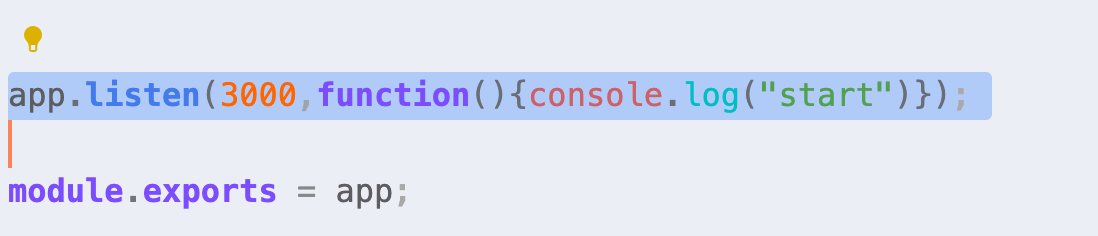
- 设置监听端口
2、登录实现部分 login.js中
3、注册实现部分 login.js中
4、连接数据库 login.js中
5、登录页面
6、注册页面
- 作者:Jimmy Huang
- 链接:https://huangjihao.com/ea2596dd-e041-409e-a001-32093288436e
- 声明:本文采用 CC BY-NC-SA 4.0 许可协议,转载请注明出处。